
 Stefan_T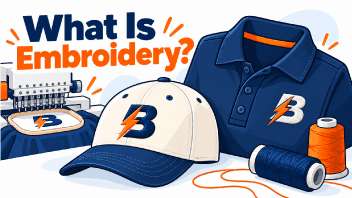
What Is Embroidery? A Complete Guide to Custom Embroidered Apparel
Custom embroidery is one of the most popular ways to decorate apparel for businesses, schools, teams, events, and organizations. If you want a polished, durable, professional look, embroidery is often the first option people think of for polos, hats, beanies, jackets, fleece, bags, blankets, and workwear.
But great custom embroidered apparel is not just about putting thread on fabric. Good embroidery depends on the design, the garment, the size of the artwork, the stitch type, and the physical limitations of embroidery machinery.
This guide explains how embroidery works, what a mechanical embroidery file is, why stitch count matters, what details should be simplified, and how to choose the best garments and placements for your embroidered design.
Quick Navigation
What Is Embroidery?
Embroidery is the process of decorating apparel and accessories with thread using a needle and embroidery machine. Instead of printing ink onto the surface of the garment, embroidery builds the design with stitched thread.
That gives embroidered logos and text a dimensional, textured appearance that many customers associate with higher-end branded apparel. It is a common choice for custom embroidered hats, embroidered beanies, embroidered polos, embroidered jackets, embroidered fleece, bags, blankets, and work uniforms.
Embroidery is especially popular for logos because it creates a clean, durable, professional look that works well for business apparel, team wear, uniforms, and branded merchandise.
In simple terms: screen printing decorates apparel with ink, while embroidery decorates apparel with thread.
How Machine Embroidery Works
Modern machine embroidery combines specialized software, commercial embroidery equipment, thread, backing, and garment positioning to create a finished embroidered logo or design.
1. The Artwork Is Reviewed
The first step is evaluating the logo or design. Not every image that looks good on a screen will work well as embroidery. Tiny details, thin lines, small text, gradients, and complicated shapes may need to be adjusted or simplified.
2. We Create a Mechanical File
The artwork is mapped using specialized embroidery software, a process also called digitizing. This creates a mechanical file that tells the embroidery machine where to place the stitches, what stitch types to use, what order to sew the elements in, what direction the stitches should travel, and when to change thread colors.
This step is critical because the embroidery machine cannot simply read a regular logo file and decide how to sew it. The design has to be translated into physical stitch instructions.
3. The Garment Is Hooped and Stabilized
The garment is secured so the embroidery area stays stable during production. Backing or stabilizer is used to support the fabric and help the stitches sew cleanly.
4. The Machine Stitches the Design
The embroidery machine follows the mechanical file and sews the design using thread. Depending on the design, this may include satin stitches, fill stitches, running stitches, or a combination of stitch types.
5. The Garment Is Cleaned and Finished
Once the embroidery is complete, the garment is cleaned up, backing is trimmed as needed, and the finished embroidery is checked for quality.
What Is a Mechanical File?
A mechanical file is the embroidery-specific file that tells the machine exactly how to sew your design.
Creating that file is also called digitizing. Specialized embroidery software is used to map the original artwork into stitches that the machine can physically reproduce.
This is not the same thing as simply uploading a JPG, PNG, PDF, or vector logo file. Even high-quality artwork still has to be translated into embroidery instructions.
A mechanical embroidery file determines:
- stitch direction
- stitch type
- stitch density
- stitch order
- thread colors
- underlay and support stitching
- where the machine starts and stops
- how the design will behave on the selected fabric
That is why a logo that looks perfect on a computer screen may still need to be simplified or adjusted before it becomes good embroidery.
Think of it this way: your artwork shows us what the finished logo should look like. The mechanical file tells the embroidery machine how to physically build that logo with thread.
Understanding Stitch Count
Stitch count refers to the number of stitches used in an embroidered design. It affects run time, thread usage, and the overall complexity of the design.
A higher stitch count does not automatically mean better embroidery quality. It simply means the embroidery machine is sewing more stitches.
Good embroidery is not about packing as many stitches as possible into a design. It is about using the right stitch count, stitch density, and stitch type for the artwork, garment, and embroidery size.
Important: More stitches do not automatically equal more detail. Too many stitches can make a design heavy, stiff, crowded, or difficult to sew cleanly.
Embroidery Has Real Physical Limitations
Embroidery machines are precise, but they are still physical machines moving needles and thread through fabric at high speed. That creates limitations that matter when you are designing an embroidered logo.
Very tiny text, narrow spaces, sharp little turns, thin outlines, and intricate details can all be difficult to reproduce cleanly. A design may look crisp on a screen but become crowded or unclear once it is converted into stitches.
This is one of the biggest differences between embroidery and printing. Ink can reproduce certain fine details, photographs, and smooth gradients that thread cannot reproduce in the same way.
Small Text
Tiny lettering is one of the most common embroidery problems. If letters are too small, they can fill in or lose clarity.
Thin Lines
Very thin lines often need to be thickened or simplified so the machine can sew them cleanly.
Tiny Gaps
Small spaces can close up when thread fills the area, especially on thicker or textured garments.
Gradients
Embroidery does not reproduce smooth fading gradients the same way digital printing does. Simplified color areas usually work better.
How to Make a Logo Embroidery-Friendly
The best custom embroidery designs are clean, readable, and created with the physical properties of thread in mind.
Embroidery Design Tips
- Keep logos simple and easy to read.
- Avoid tiny lettering whenever possible.
- Use thicker lines and bolder shapes.
- Skip smooth fading gradients and photo effects.
- Reduce unnecessary fine detail.
- Make sure small spaces are not too tight.
- Expect the design to be adjusted for thread, fabric, and stitch type.
Minimum Letter Height Matters
Letter size is one of the most important considerations in embroidery because thread has physical width and the needle needs enough space to form each character cleanly.
On hats and caps, a good general minimum for simple embroidered lettering is approximately 0.30 to 0.35 inches tall.
Some fonts need considerably more space. Serif fonts, athletic fonts, and other complicated lettering styles may require letters approximately 0.50 to 0.60 inches tall to reproduce clearly.
Clean, simple fonts generally work better at smaller sizes because the shapes contain fewer tiny features for the embroidery machine to reproduce.
If you are creating artwork specifically for hats, read our hat design guide and our guide to choosing the best hats for embroidery.
Best Embroidery Placements
Embroidery is most often used in smaller, premium-looking placements rather than very large decoration areas.
| Placement | Common Use | Typical Guidance |
|---|---|---|
| Left Chest | Polos, jackets, quarter-zips, work shirts, fleece | Typically around 3 to 3.5 inches wide |
| Hat Front | Trucker hats, dad hats, structured caps | Usually about 4 inches wide and around 2 inches high or less |
| Beanies | Beanies, knit caps, cuffed winter hats | Small to medium logos work best within the available embroidery area |
| Hat Side or Back | Secondary branding, names, initials, short text | Smaller and simpler designs work best |
| Bags and Blankets | Totes, backpacks, blankets, accessories | Generally best with a smaller decoration area based on product construction |
If you want ideas specifically for chest logos, check out our article on left chest logo ideas.
Best Products for Embroidery
Embroidery is usually the best fit for garments and products where a stitched logo looks natural, durable, and professional.
Beanies
One of our top-selling embroidery products. Beanies provide a natural location for a clean company logo, school mark, team design, or winter event branding.
Hats & Caps
Trucker hats, structured caps, dad hats, and other styles are some of the most popular products for custom embroidered logos.
Polos
A classic option for company apparel, staff uniforms, golf events, trade shows, sales teams, and professional branded clothing.
Jackets & Fleece
Ideal for company outerwear, work apparel, and team gear where a stitched logo creates a polished premium appearance.
Bags and Blankets
Bags, blankets, and similar products can also be embroidered, but they generally work best with a smaller decoration area. Product construction, seams, thickness, and the available hooping area can all limit the size and placement of the embroidered design.
If hats are your focus, visit our custom hat embroidery category to explore styles and options.
Embroidery vs. Screen Printing
Embroidery and screen printing are both excellent decoration methods, but they solve different problems.
| Feature | Embroidery | Screen Printing |
|---|---|---|
| How it decorates | Uses thread and stitches | Uses ink applied through screens |
| Look | Textured, dimensional, professional | Flat printed surface that works well for larger graphics |
| Best placements | Left chest, hats, beanies, bags, smaller logo placements | Full fronts, backs, sleeves, and larger print areas |
| Fine detail | Limited by thread, stitch width, lettering size, and machine movement | Better suited to very fine details, gradients, and large artwork |
| Best use case | Professional branded apparel, hats, beanies, outerwear, and accessories | Custom t-shirts, event shirts, large graphics, and bulk printed apparel |
If your design is a small company logo on a polo, jacket, hat, or beanie, embroidery is often an excellent fit. If your design is a large full-front graphic with lots of detail or gradients, screen printing or digital printing may make more sense.
Create Custom Embroidered Apparel
Embroidery remains one of the best decoration methods for businesses and organizations that want a clean, durable, professional look on hats, beanies, polos, outerwear, bags, blankets, and accessories.
The key is understanding that embroidery is not printing. It has its own strengths, physical limitations, lettering requirements, and design rules.
When the artwork is properly mapped into a mechanical file and matched to the right product and placement, embroidery can produce polished branded apparel that looks professional and holds up well to regular use.
At Bolt Printing, your artwork is reviewed before production and you'll receive a proof showing how your design will be set up. What you approve is what we print.
Ready to Create Embroidered Apparel?
Choose your apparel, upload your logo, and create your embroidered design online.
Shop Embroidered Products